In recent patches of GarageBand, the application’s behavior changed in a way that contradicts both its past behavior and its current user manual. In short: there appears to be a bug in the software. The bug surfaces when the reader follows the instructions in “Chapter 4: Timbre, Instruments, and Loops” of Contemporary Songwriting with Ableton Live and GarageBand, Third Edition, and while it doesn’t prevent the reader from successfully completing a song, it does tend to degrade the musical quality of that song. Therefore, an optional, manual bug fix is advised. This bug fix involves using a custom calculator. The calculator, followed by a set of instructions, are below.
Note: this information is current as of GarageBand for Mac 10.4.14.
GarageBand loop helper
Loop Key Fix
Green MIDI Apple Loops can insert at their own key instead of your project's. Enter the loop's key (from the Loop Browser's Key column) and your project key; this shows how far to transpose the loop's notes.
Transpose the notes by
0
Applying it in GarageBand
Why to Use These Instructions
In GarageBand, loops from the Loop Browser may not be in the same key as the project. When the loops and their project are in different keys, this can sound bad.
Helpfully, GarageBand usually fixes this: it automatically adjusts (“transposes”) loops, changing their key to match the project key.
However, the current version of GarageBand sometimes fails to do this with MIDI loops. Thus, you must do it yourself, manually.
When to Use These Instructions
These instructions should first be applied while you are in the “Using the Loop Browser” section Chapter 4’s Tutorial—specifically, when you are instructed to drag and drop a bass loop into the Loop Browser per the following sentence in the book: “Once you have found a loop, drag and drop it from the Loop Browser into the Tracks Area.” The instructions should again be applied whenever you are instructed to drag a MIDI loop into the Loop Browser thereafter.
In short: any time that you are instructed to drag-and-drop a MIDI loop into the Loop Browser in Chapter 4, follow these instructions.
The Instructions
1. Show the loop’s key in the Loop Browser:
The Loop Browser can display each loop’s original key, but the option has to be switched on. Make sure it’s checked:
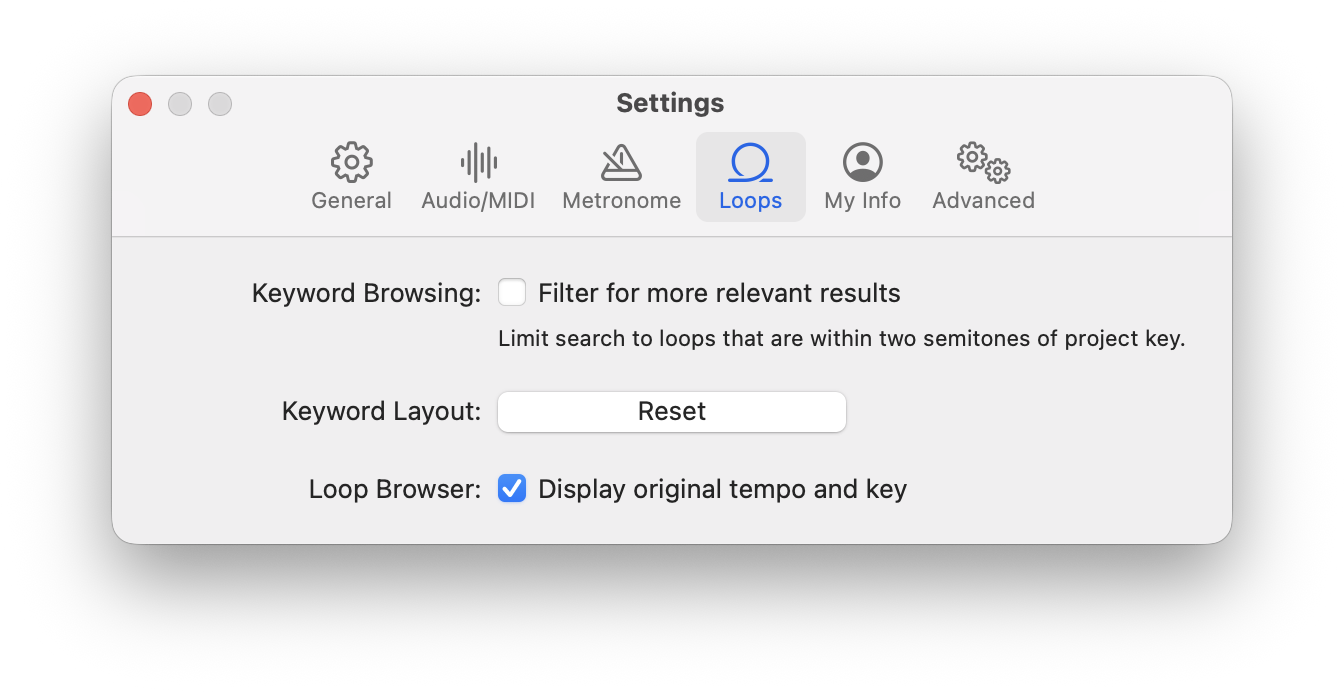
Choose GarageBand > Settings (or press Command-Comma). Click the Loops tab. Confirm “Display original tempo and key” is checked.
2. Note the two keys:
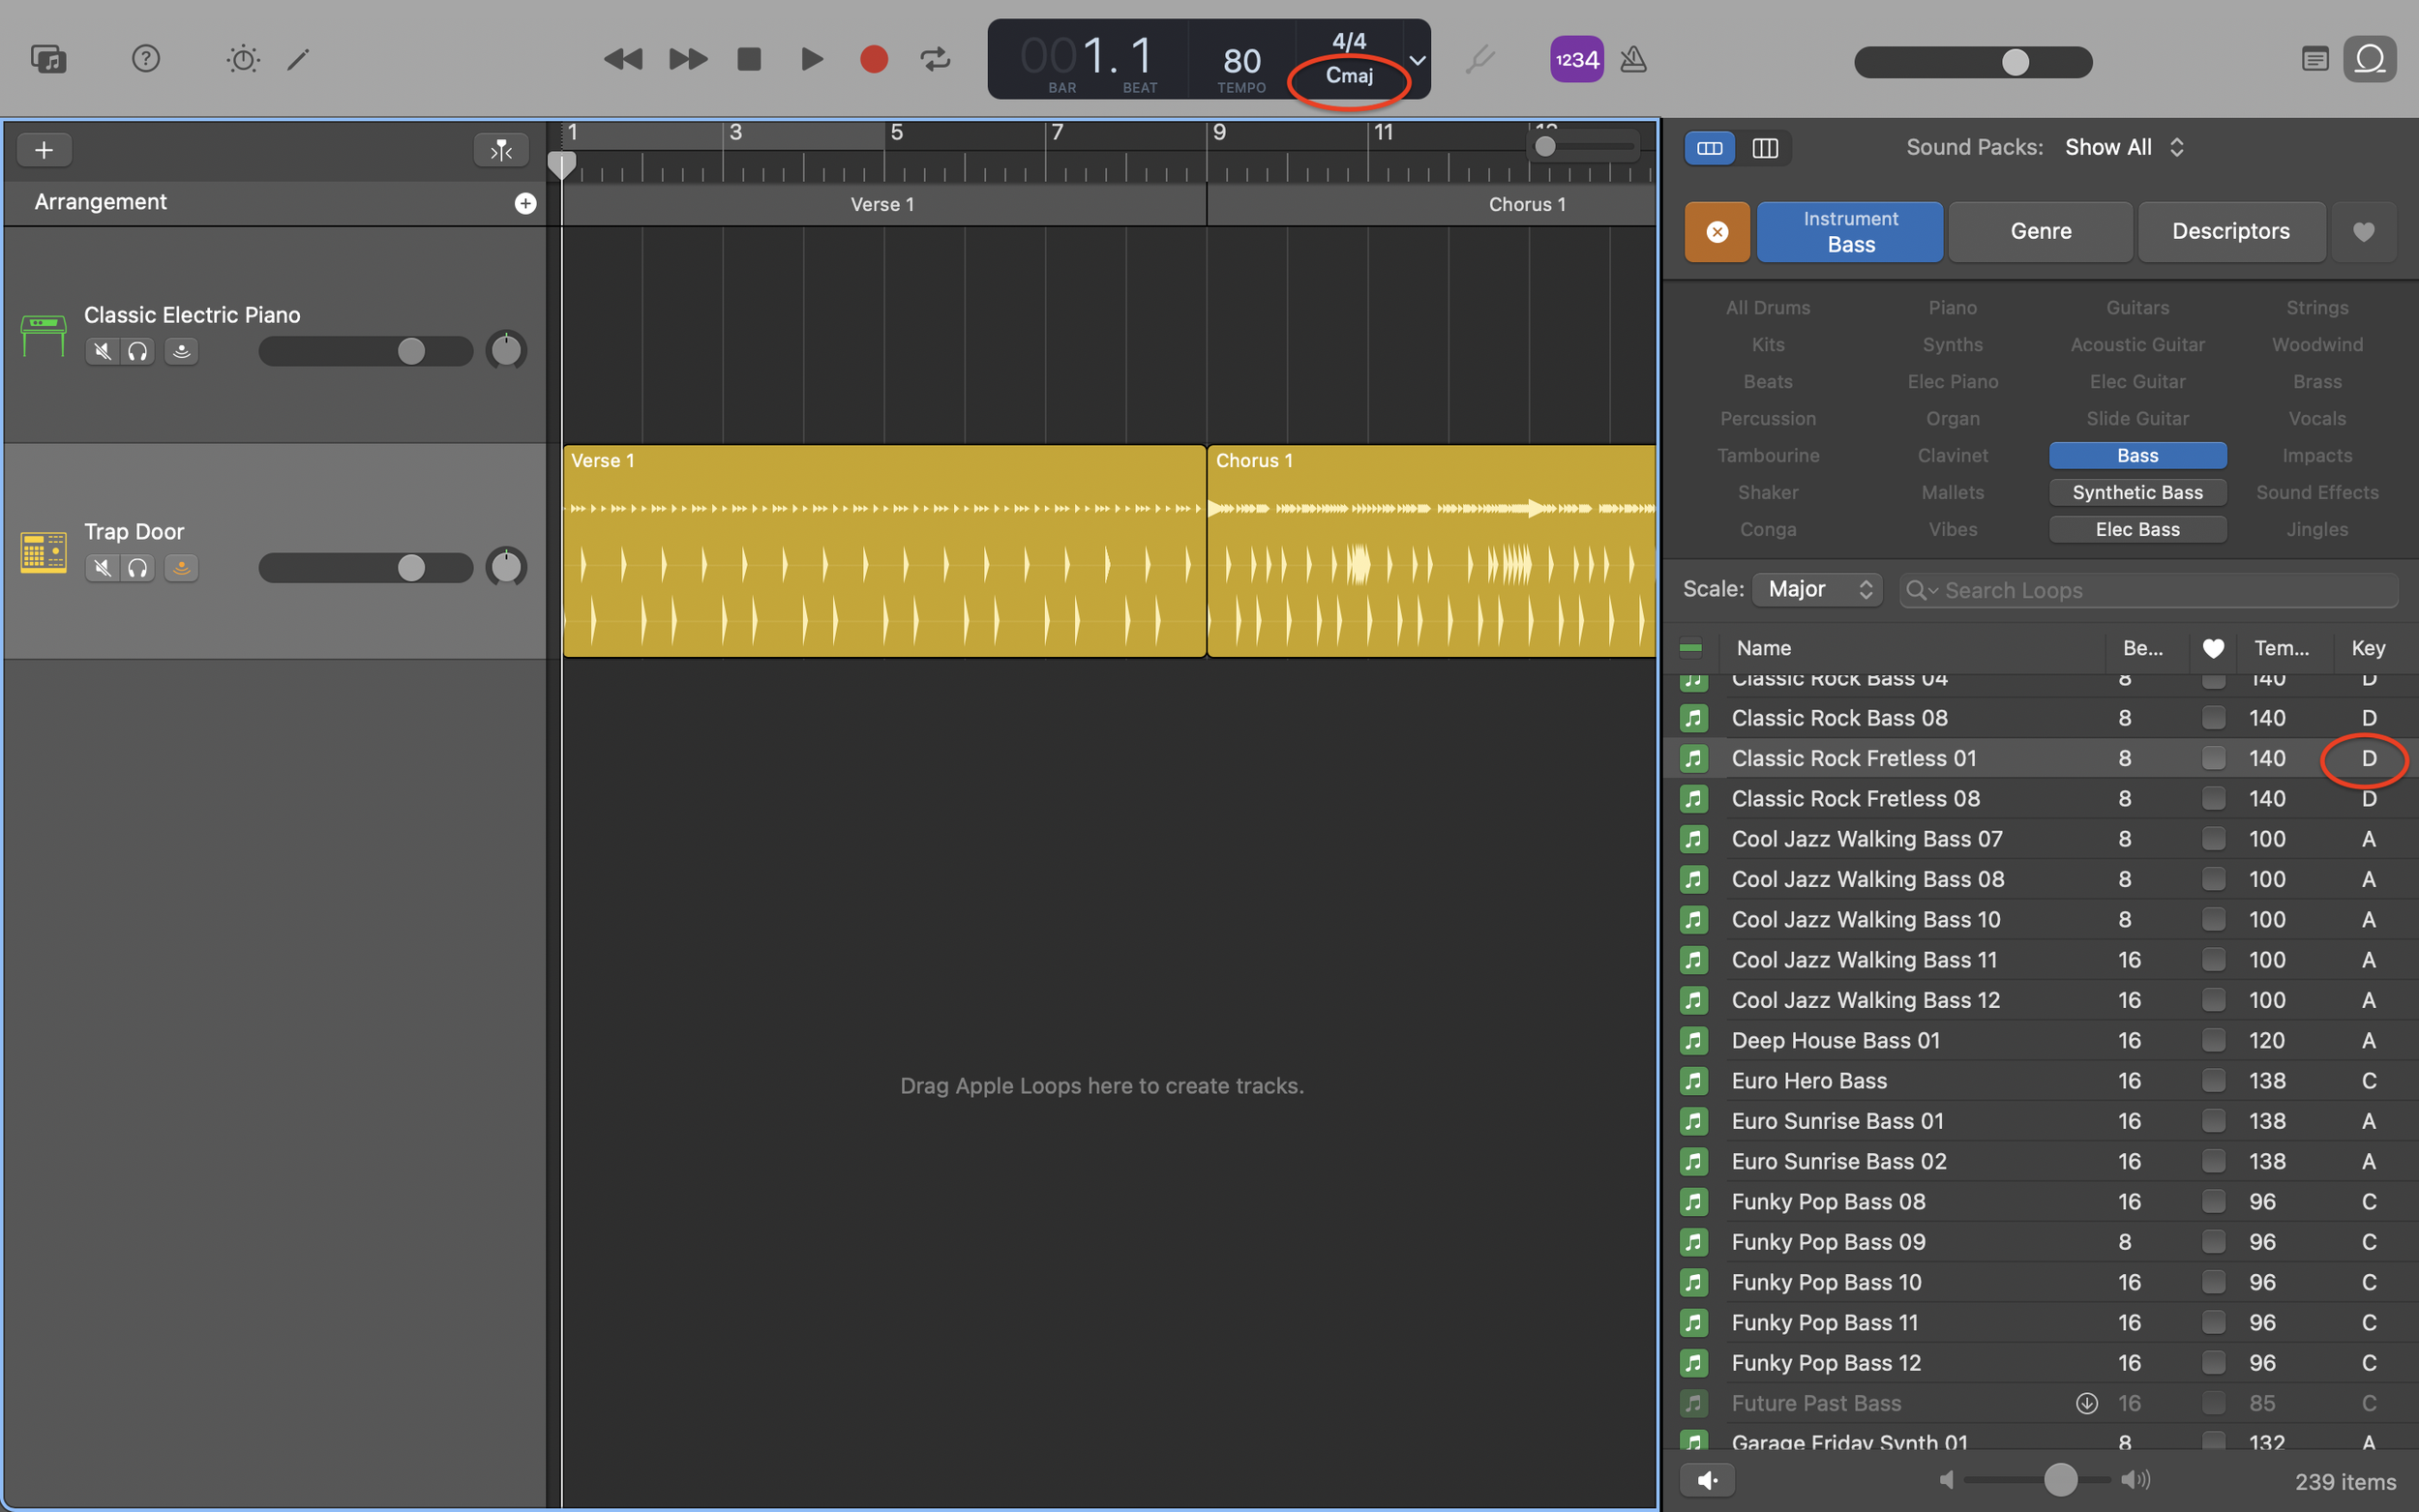
In the Loop Browser’s Key column, read the loop’s key (e.g., “D” for D major or “Dm” for D minor). Check your project’s key in the LCD display at the top of the GarageBand window. In this image, these two items are circled:
3. Get the calculator’s number:
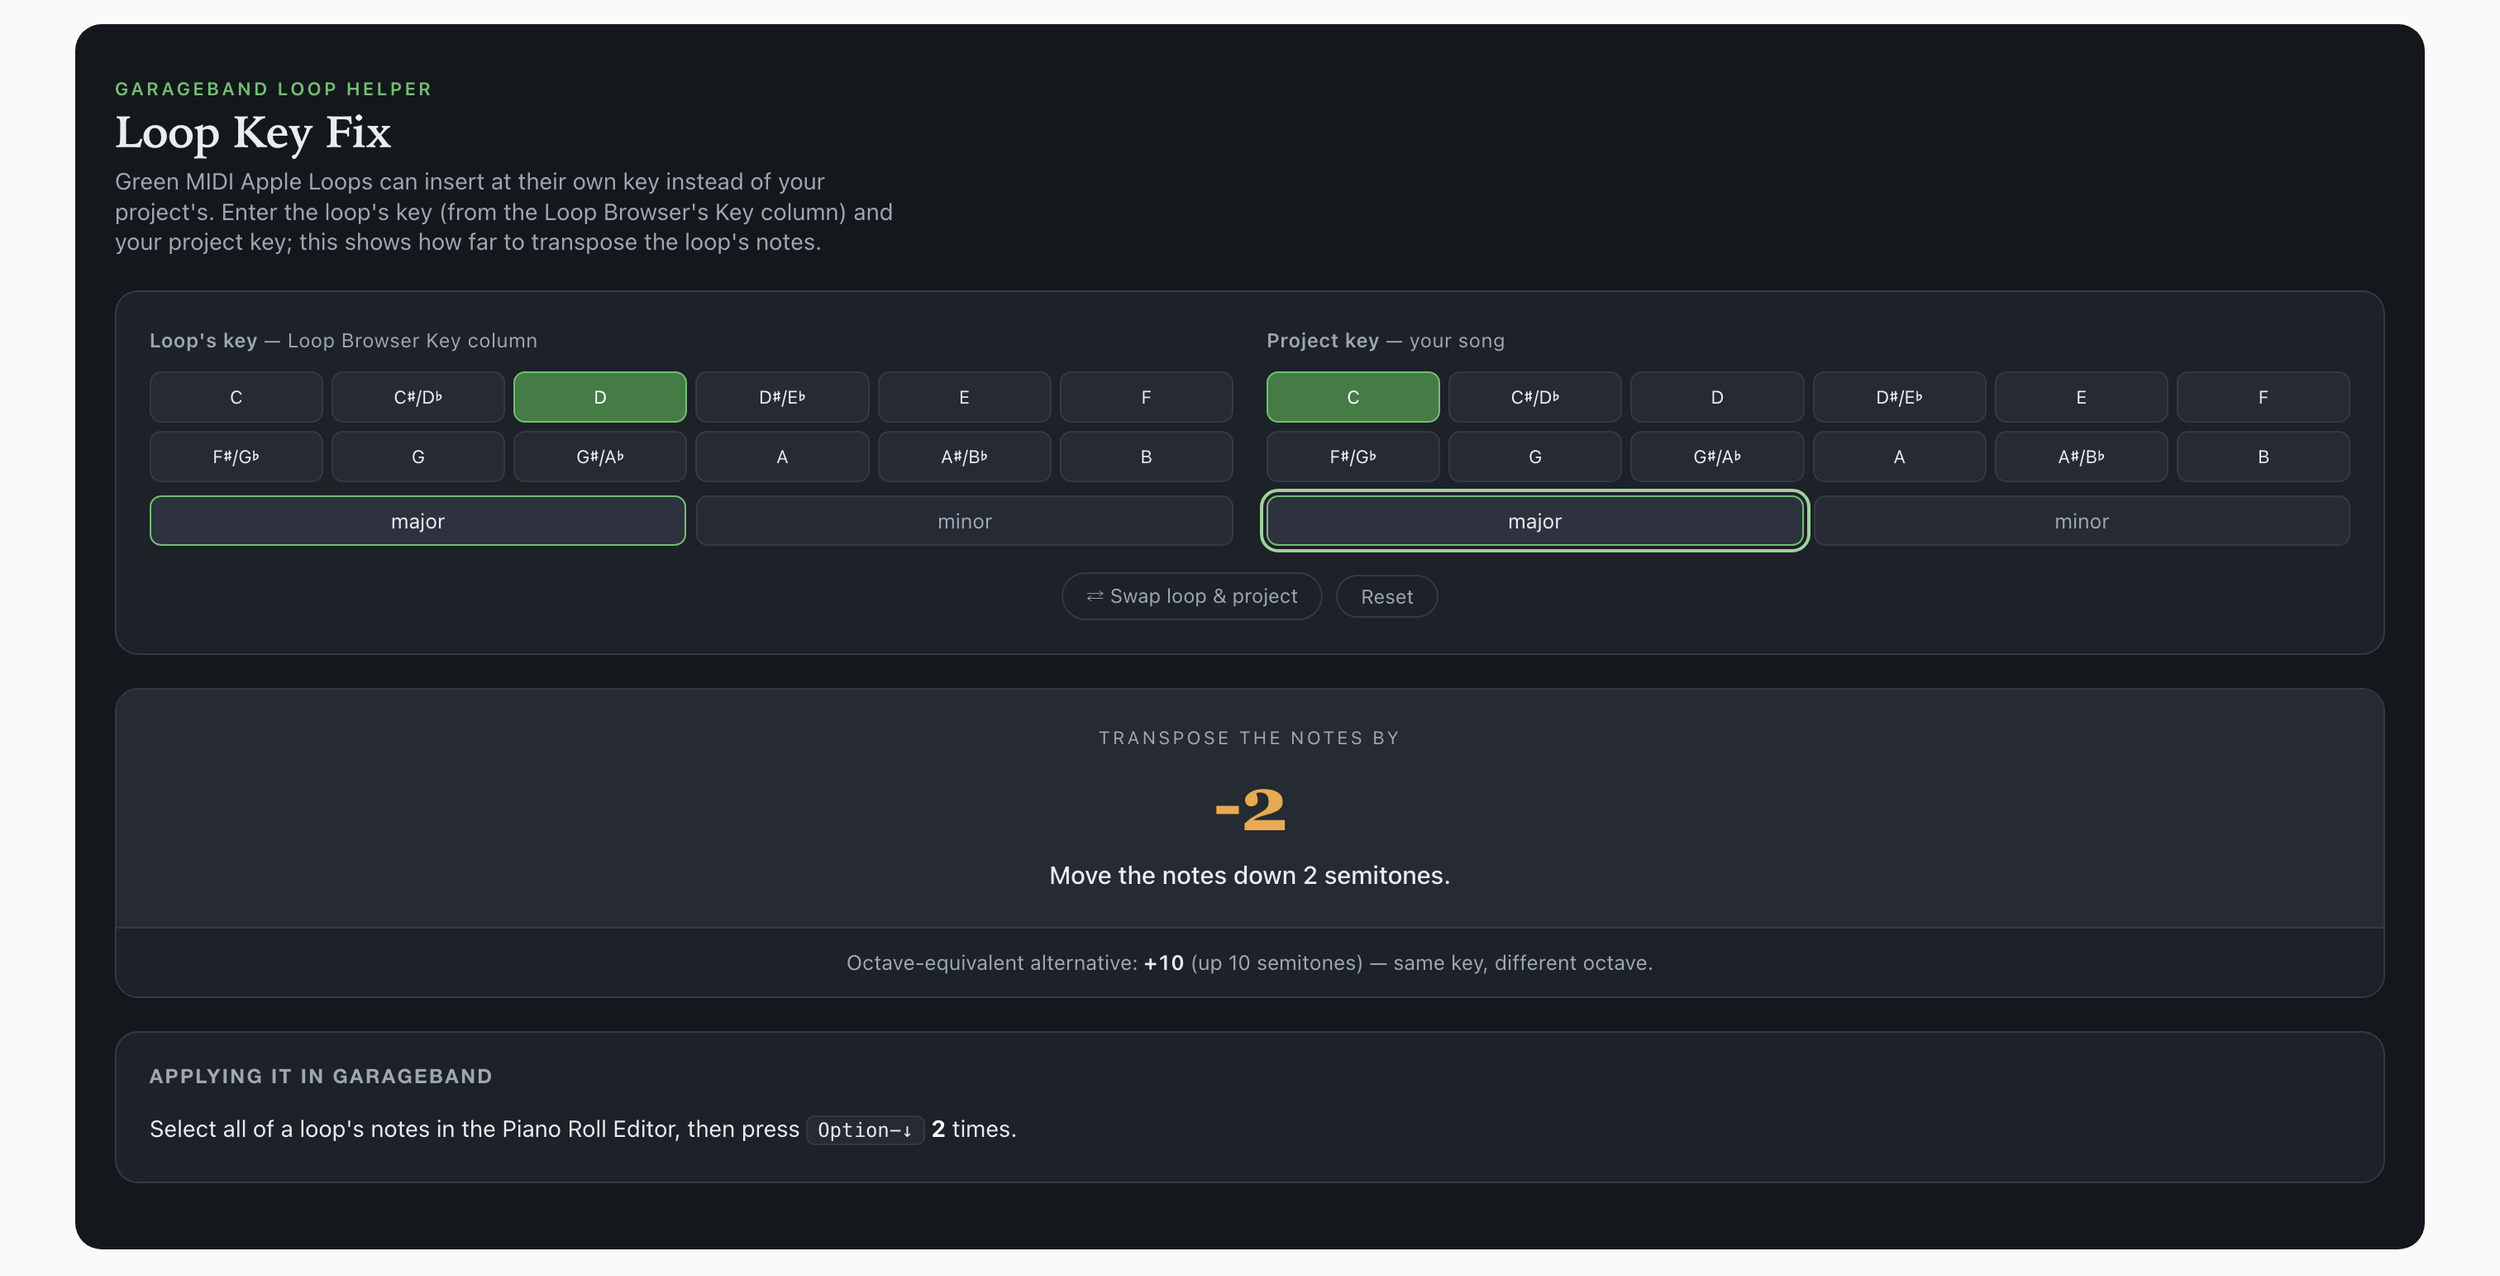
In the Loop Key Fix calculator, choose the loop’s key and mode (major vs. minor) and the project’s key and mode. Some keys can be written two ways (e.g., C♯ and D♭). The buttons show both, so just match what you see in GarageBand. Read the number the calculator gives. (Note: if the calculator tells you the keys already match, nothing more is needed—you may proceed to drag the loop into the project and ignore the rest of these instructions.) In this image, the loop’s key is D major, the project’s key is C major, and the calculator’s resulting number is -2:
4. Apply the number:
Drag the loop to the empty area below all tracks. GarageBand creates a new track with the loop alone in it.
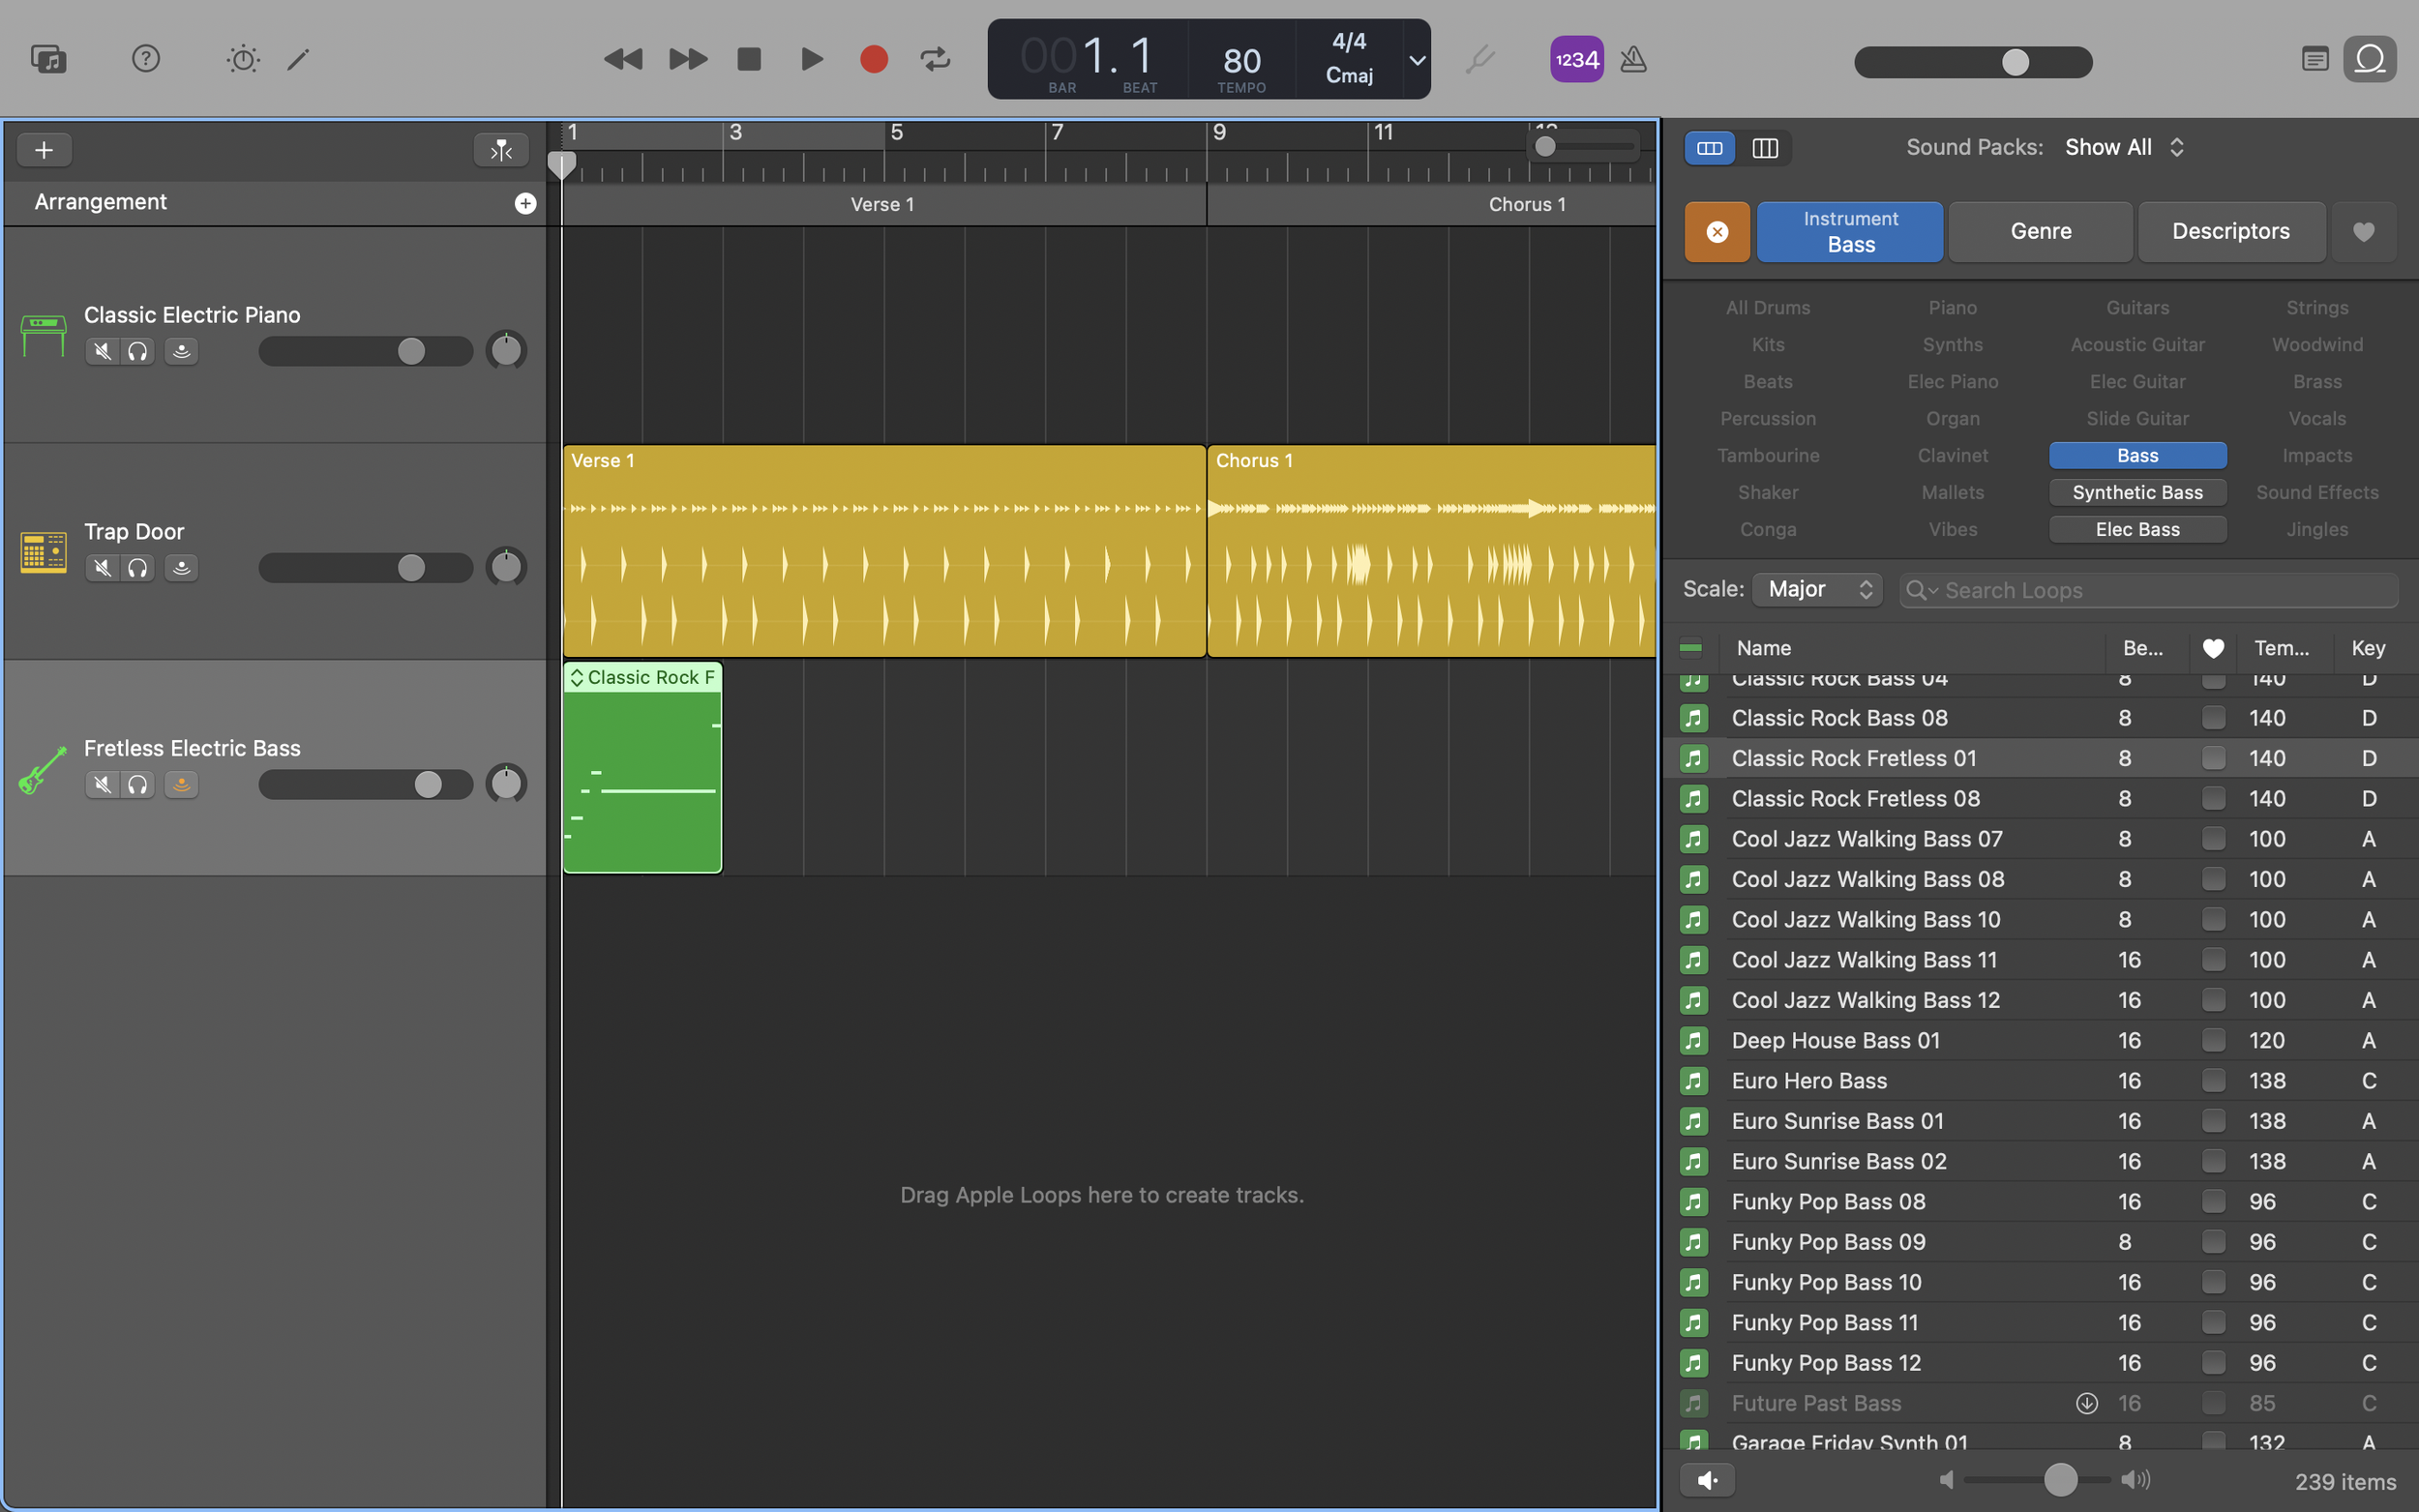
Double-click the loop to open the Piano Roll Editor.
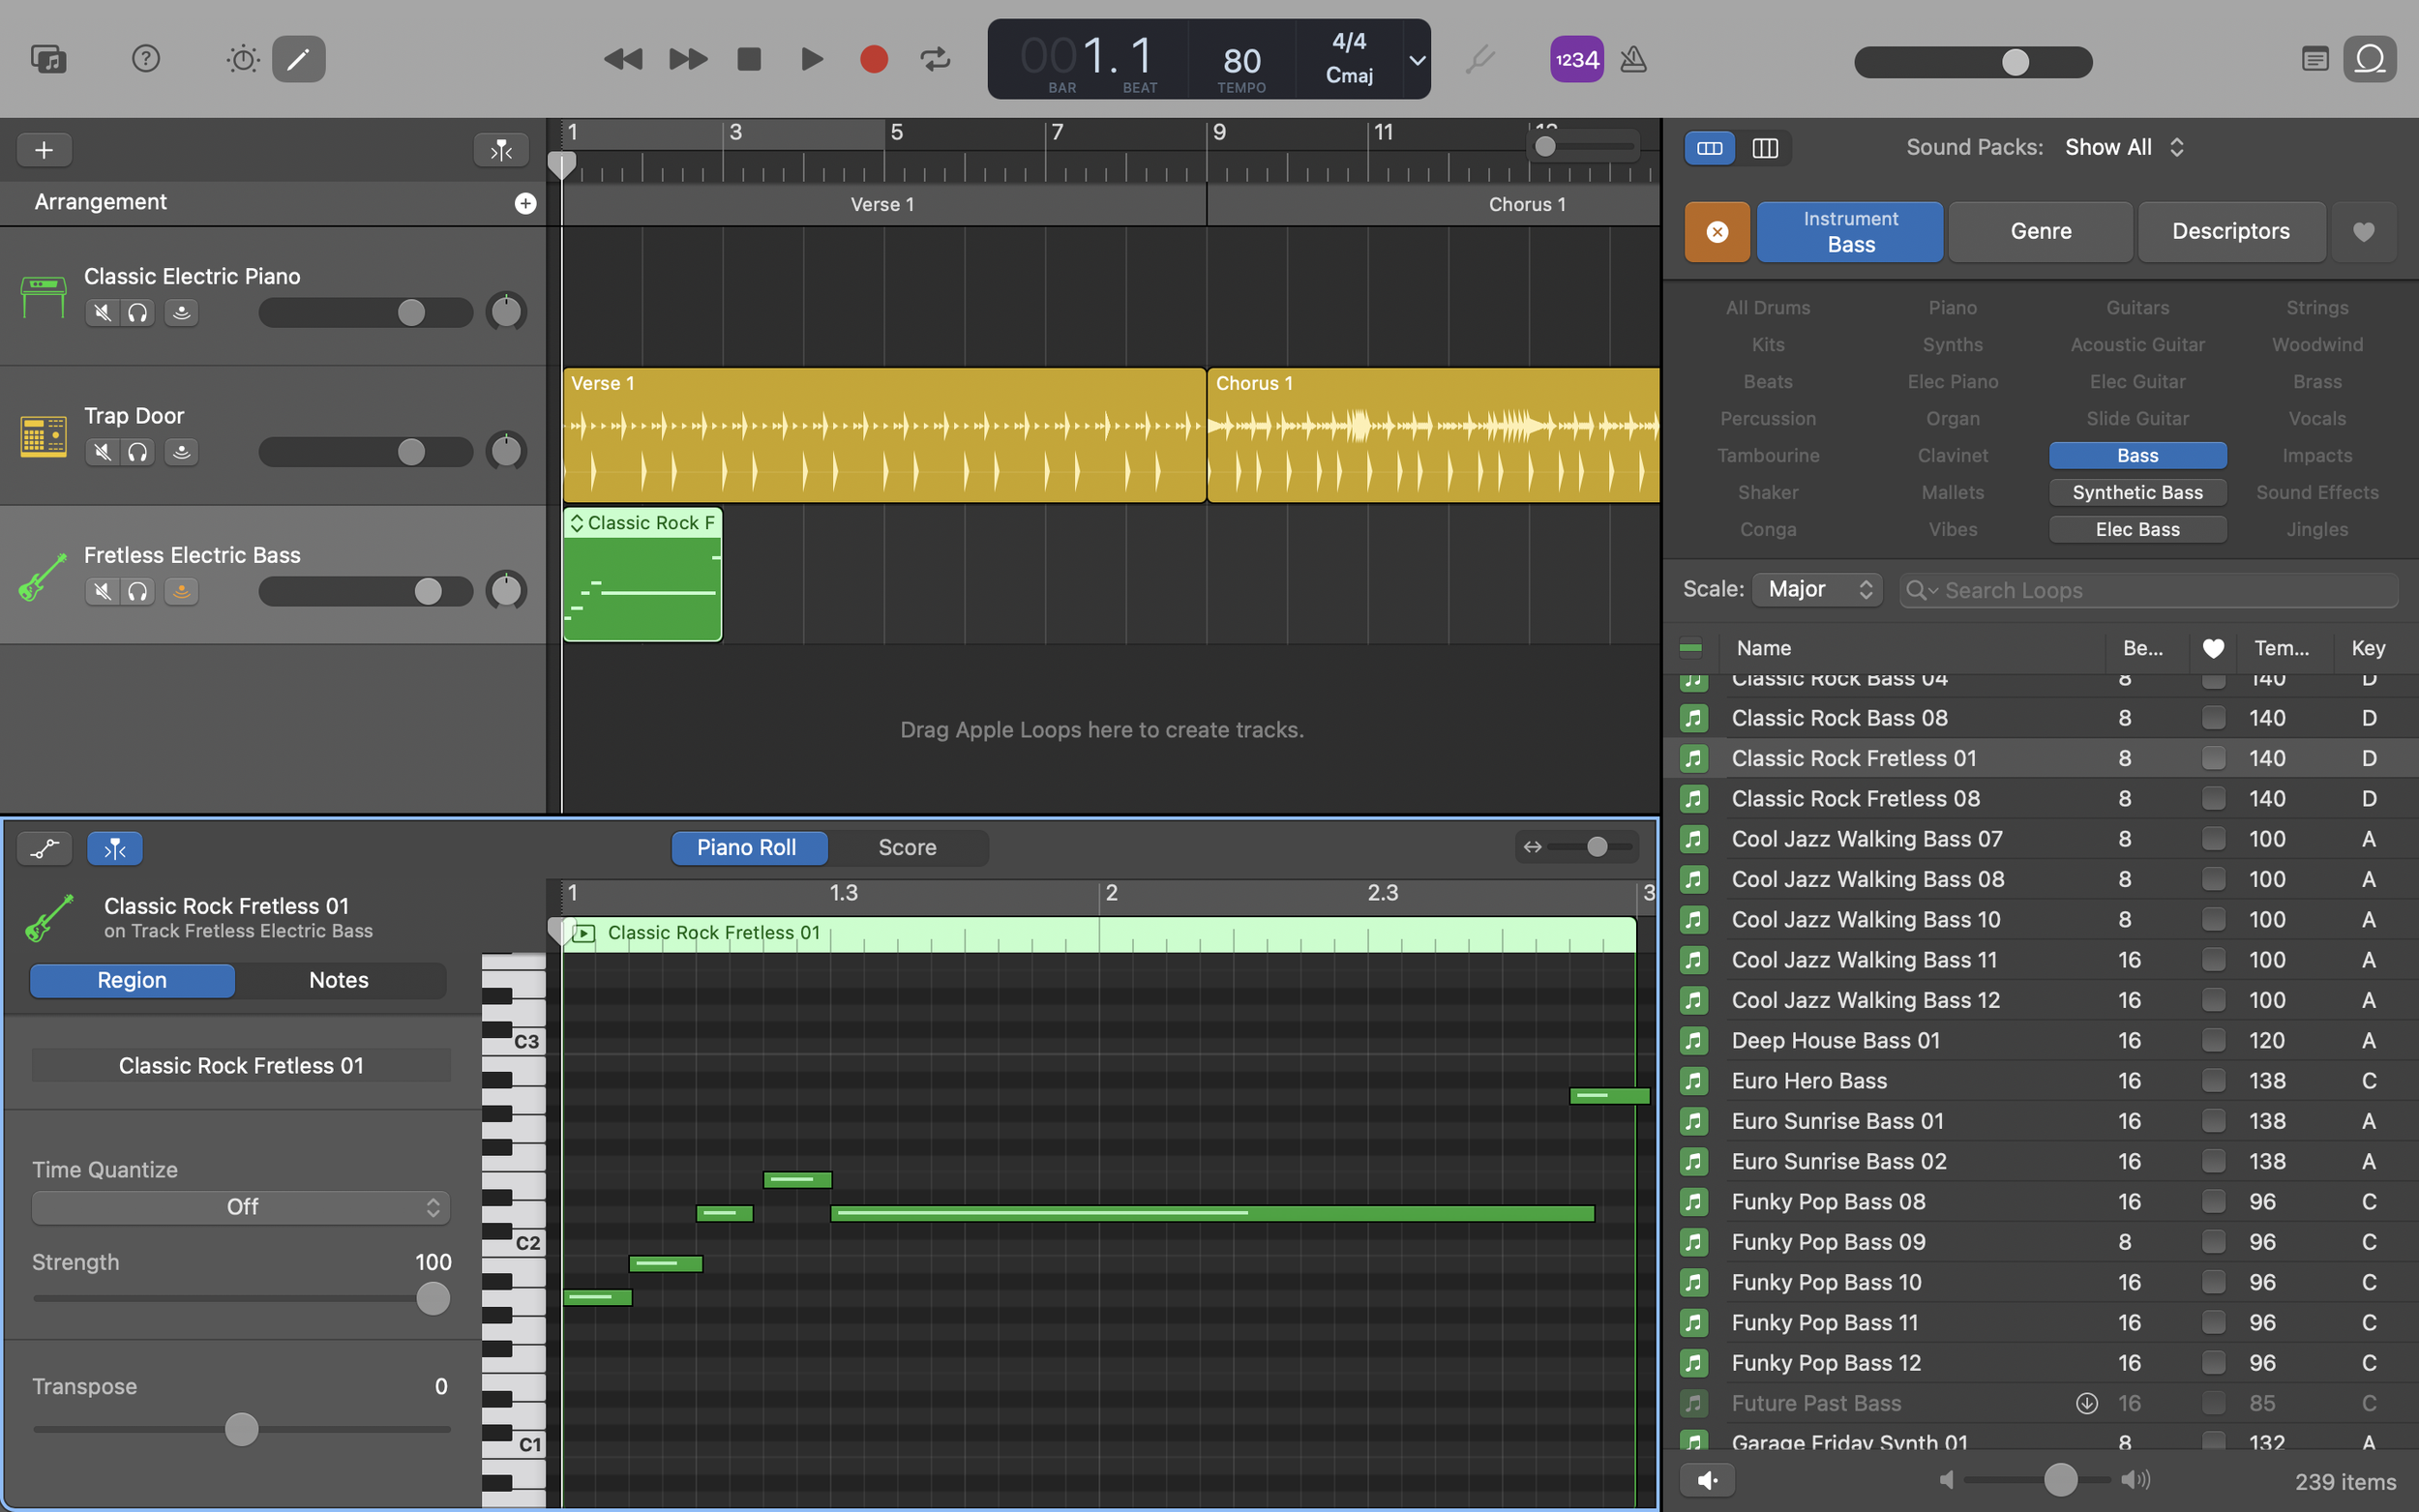
Click an empty gray area of the Piano Roll Editor’s grid to put the editor in focus, then select all its notes (choose Edit > Select All, or press Command-A).
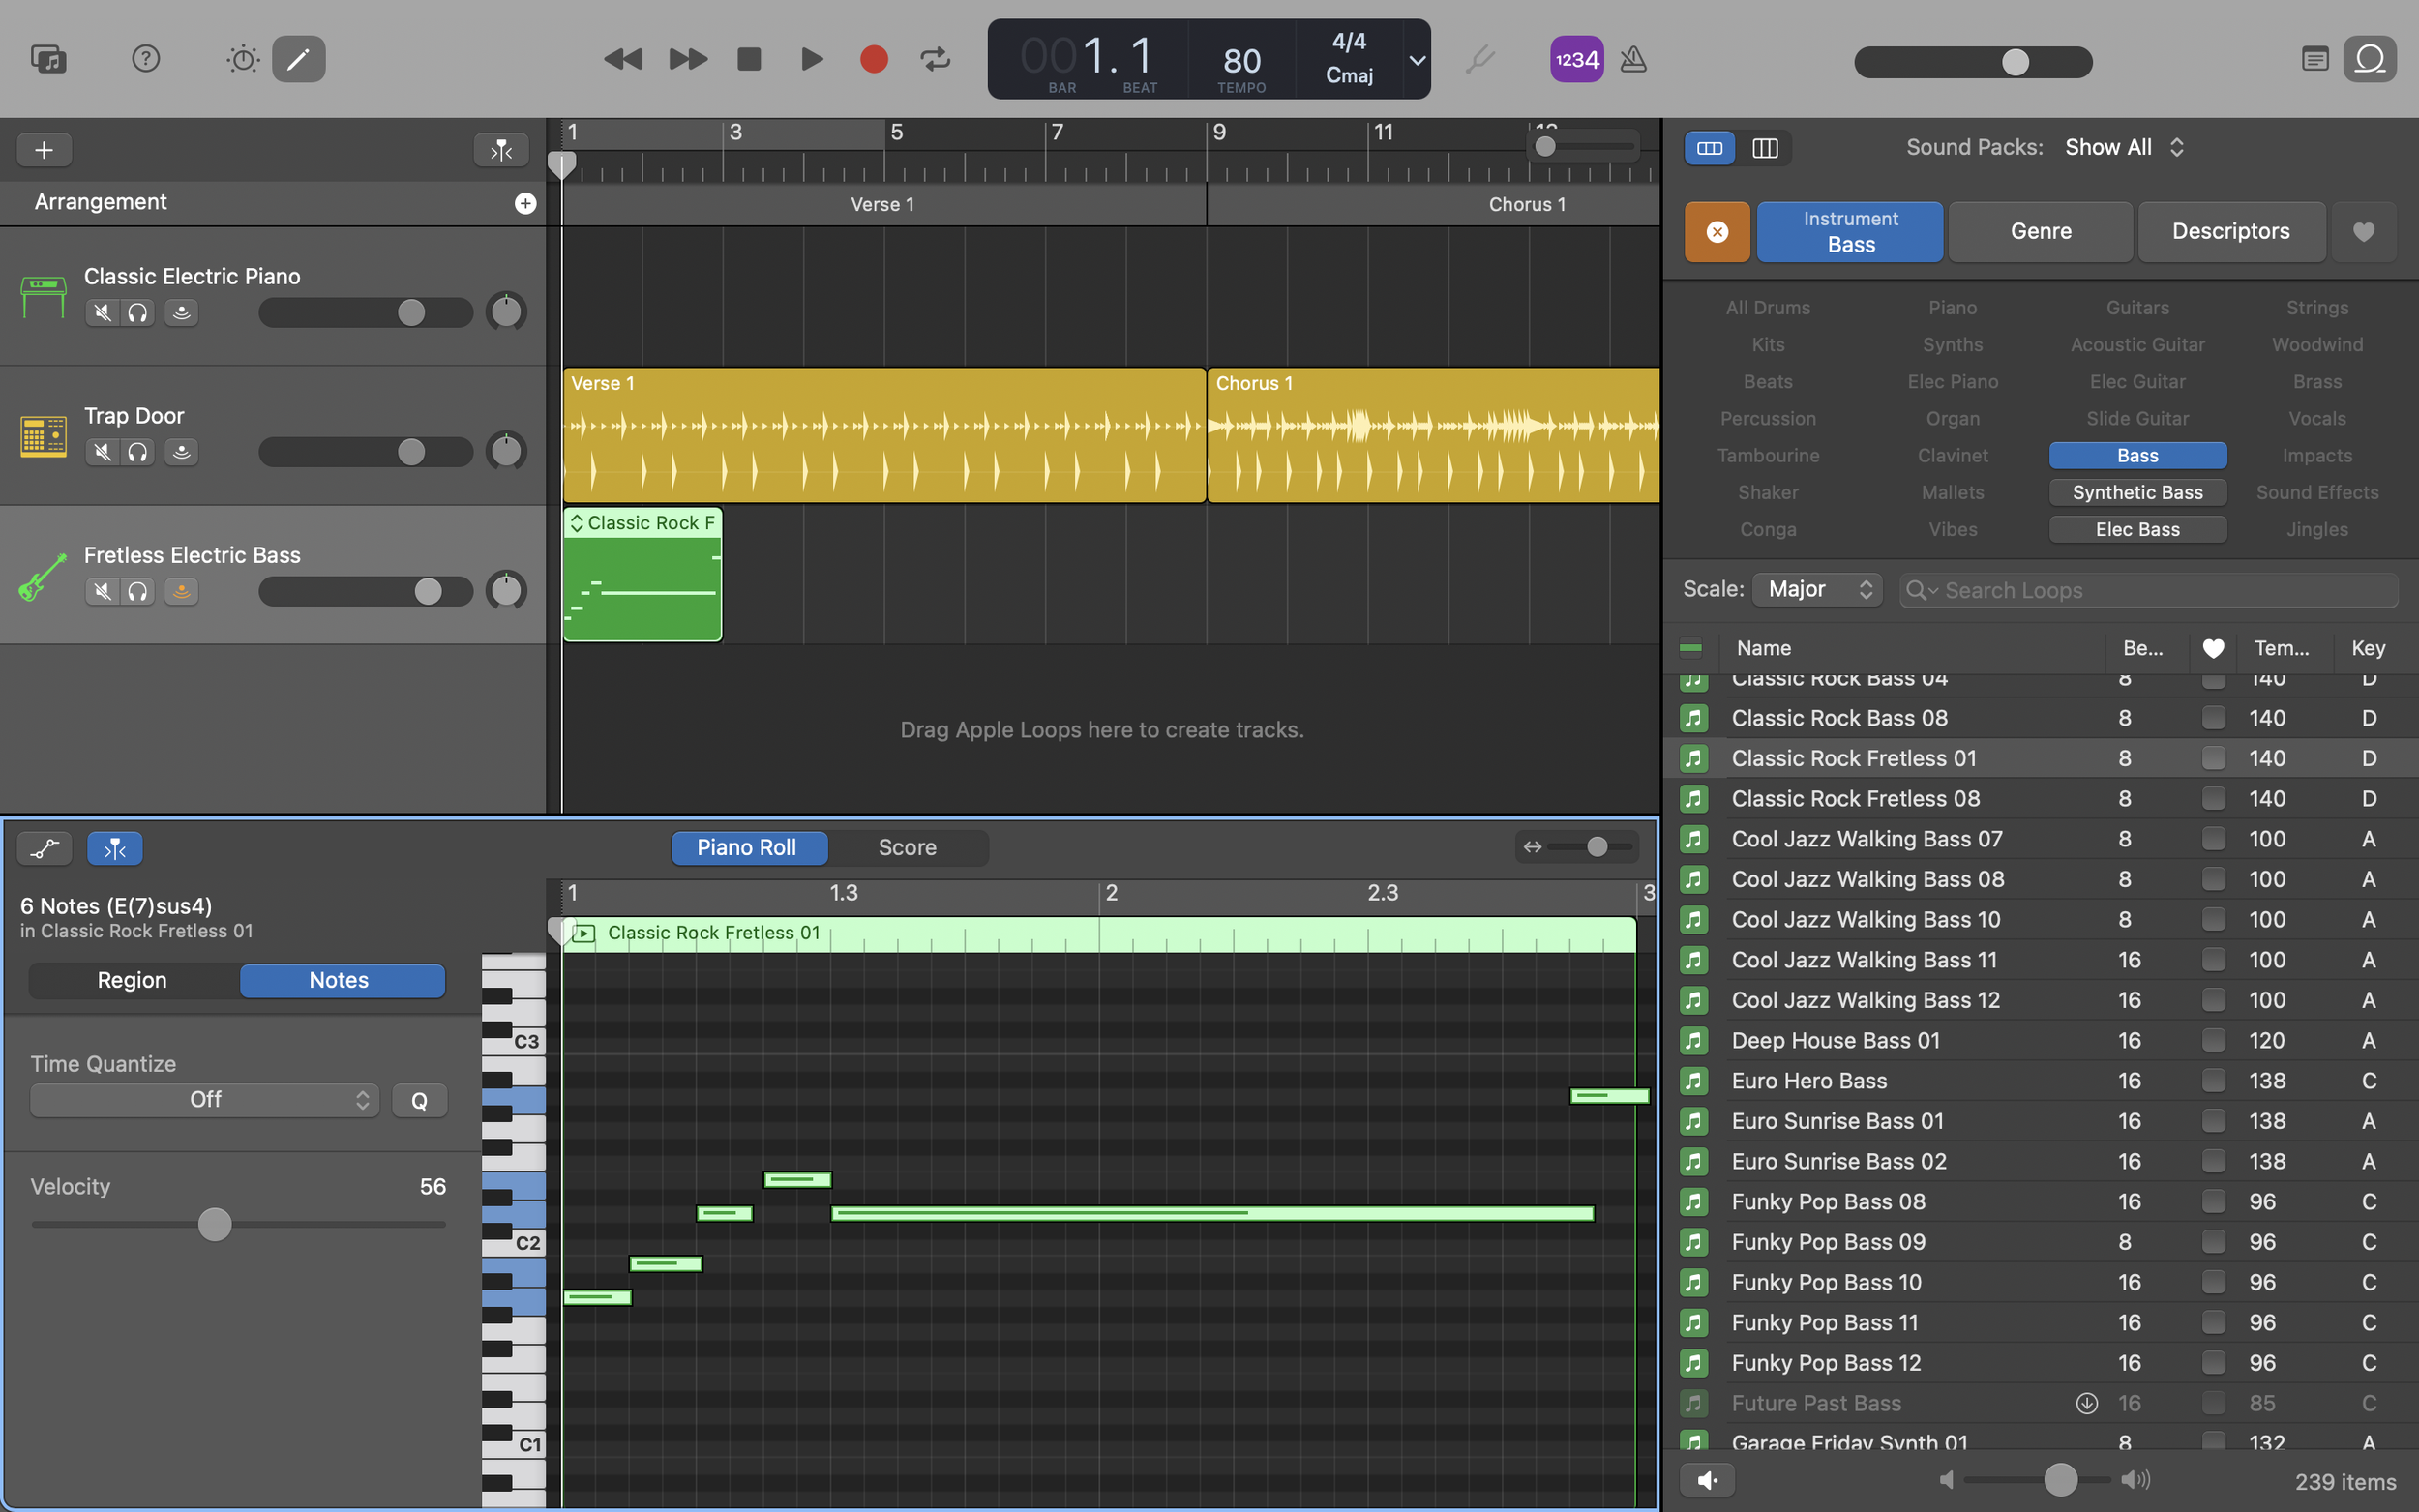
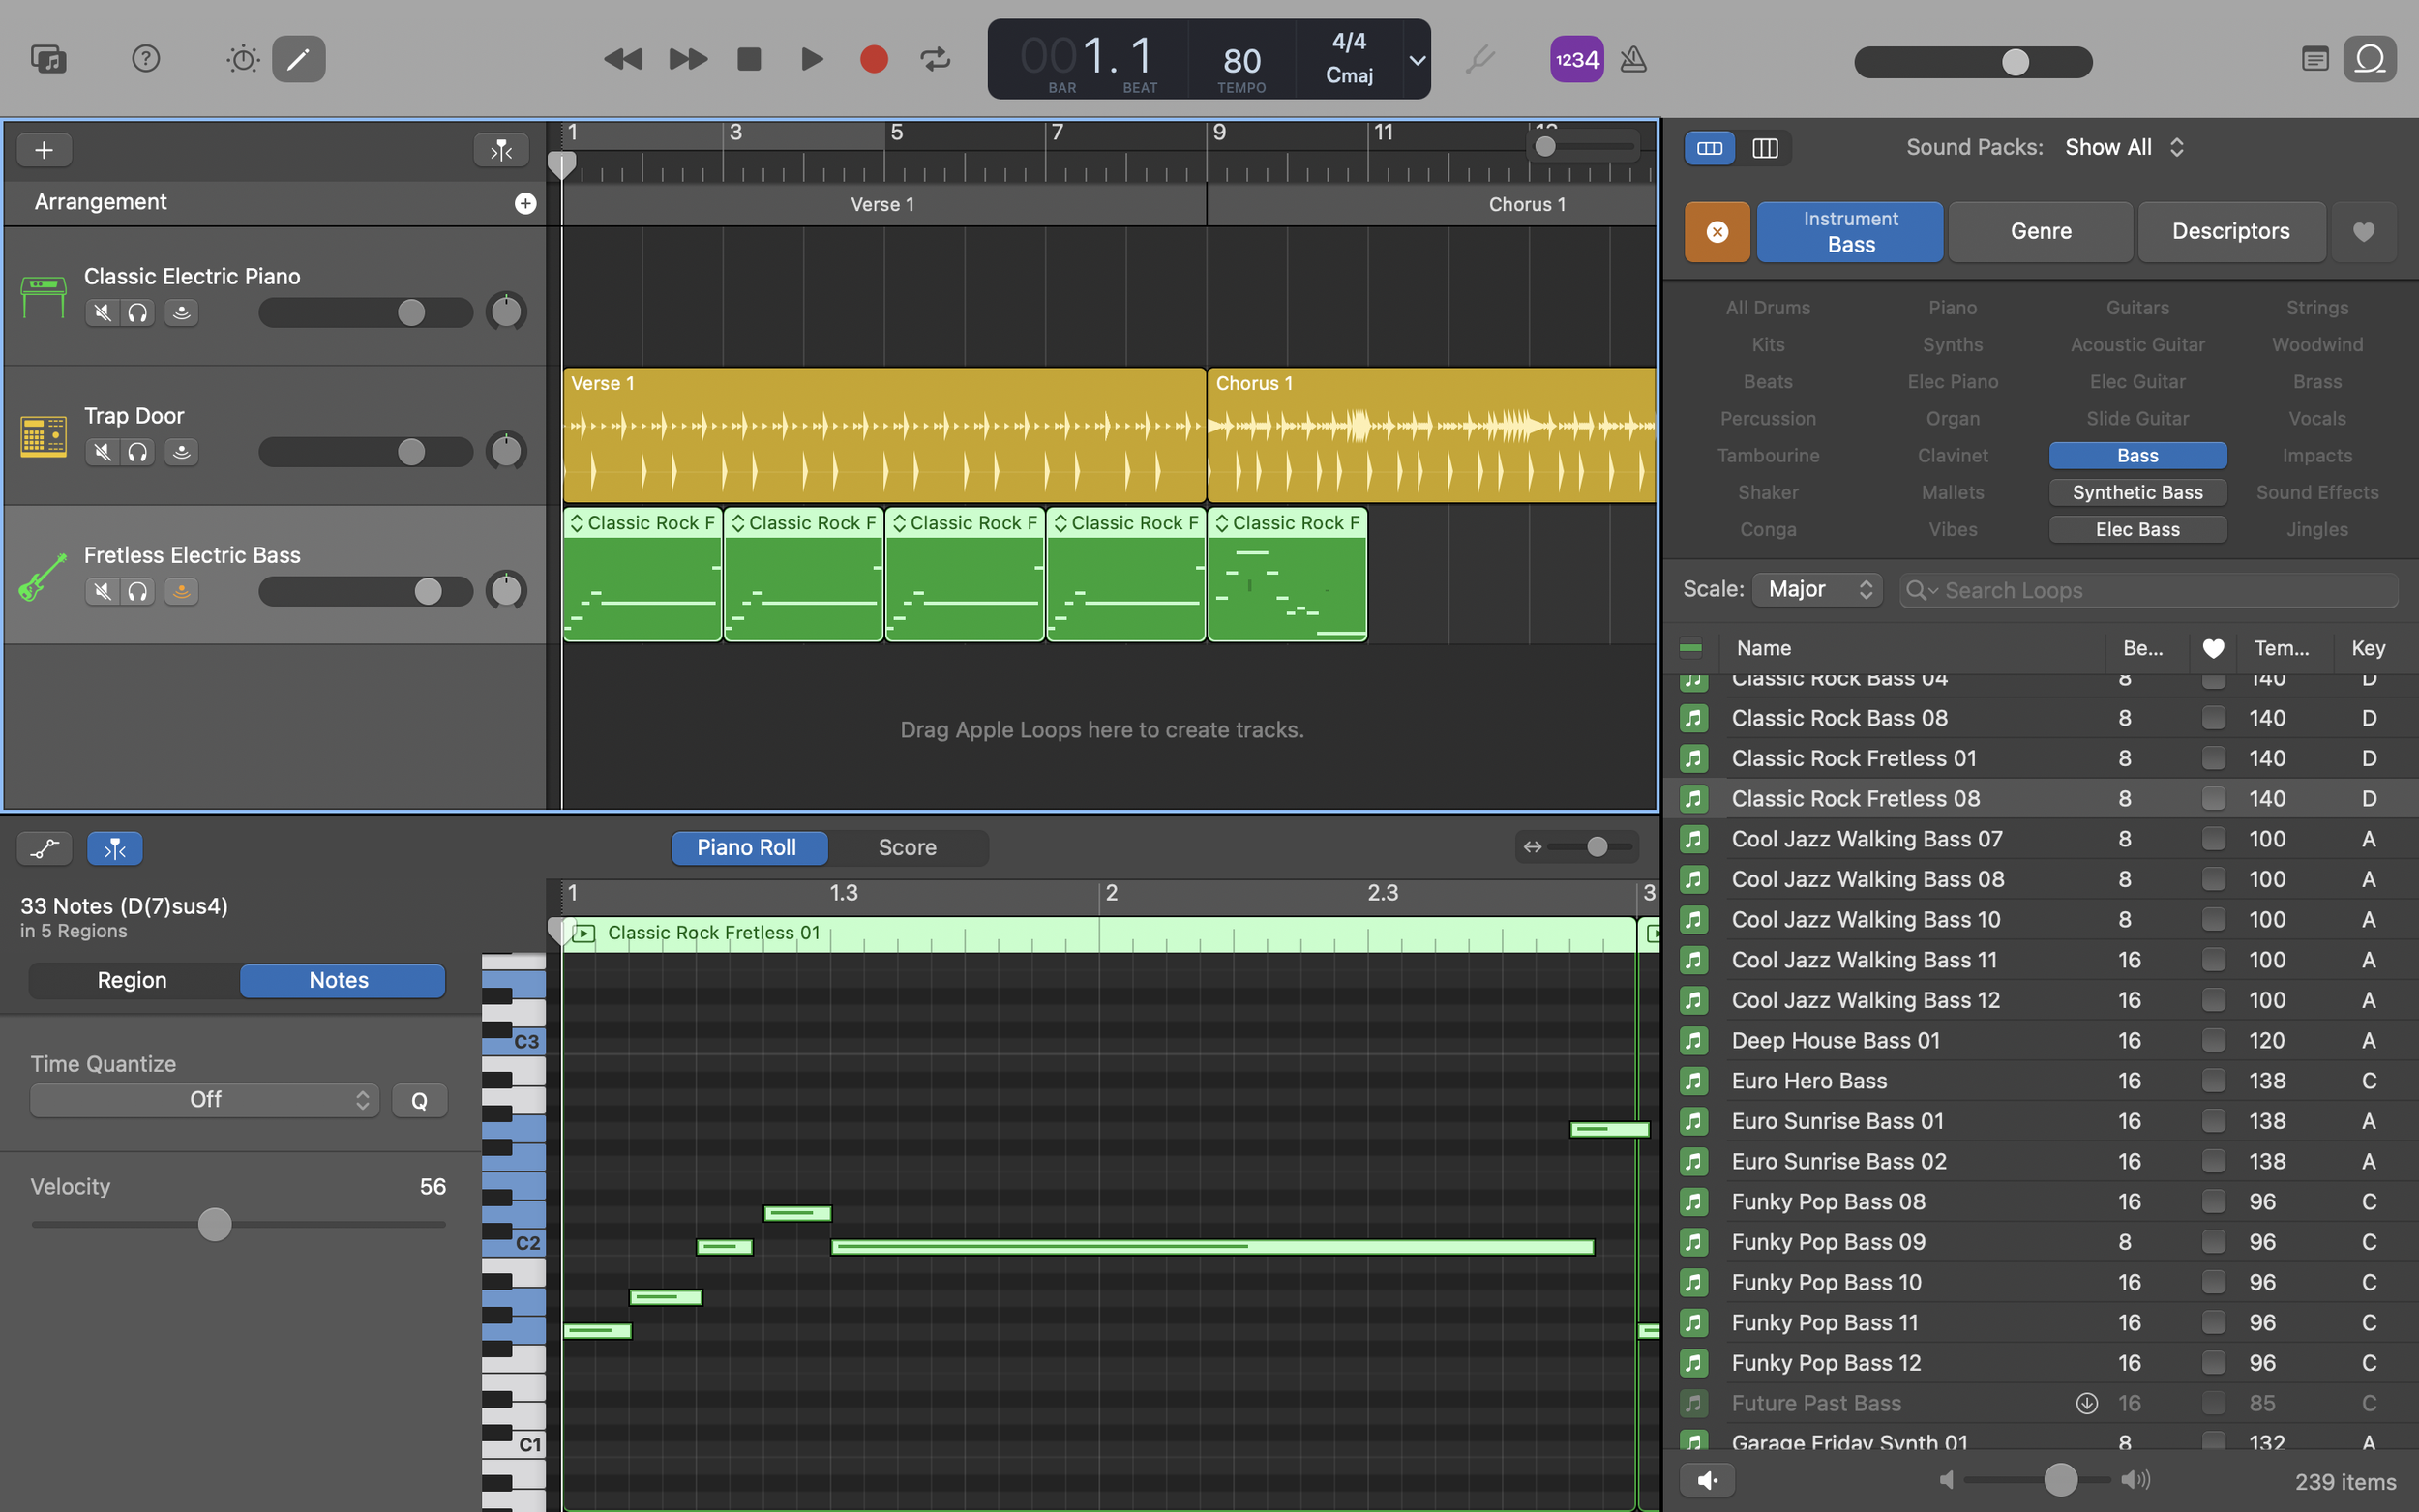
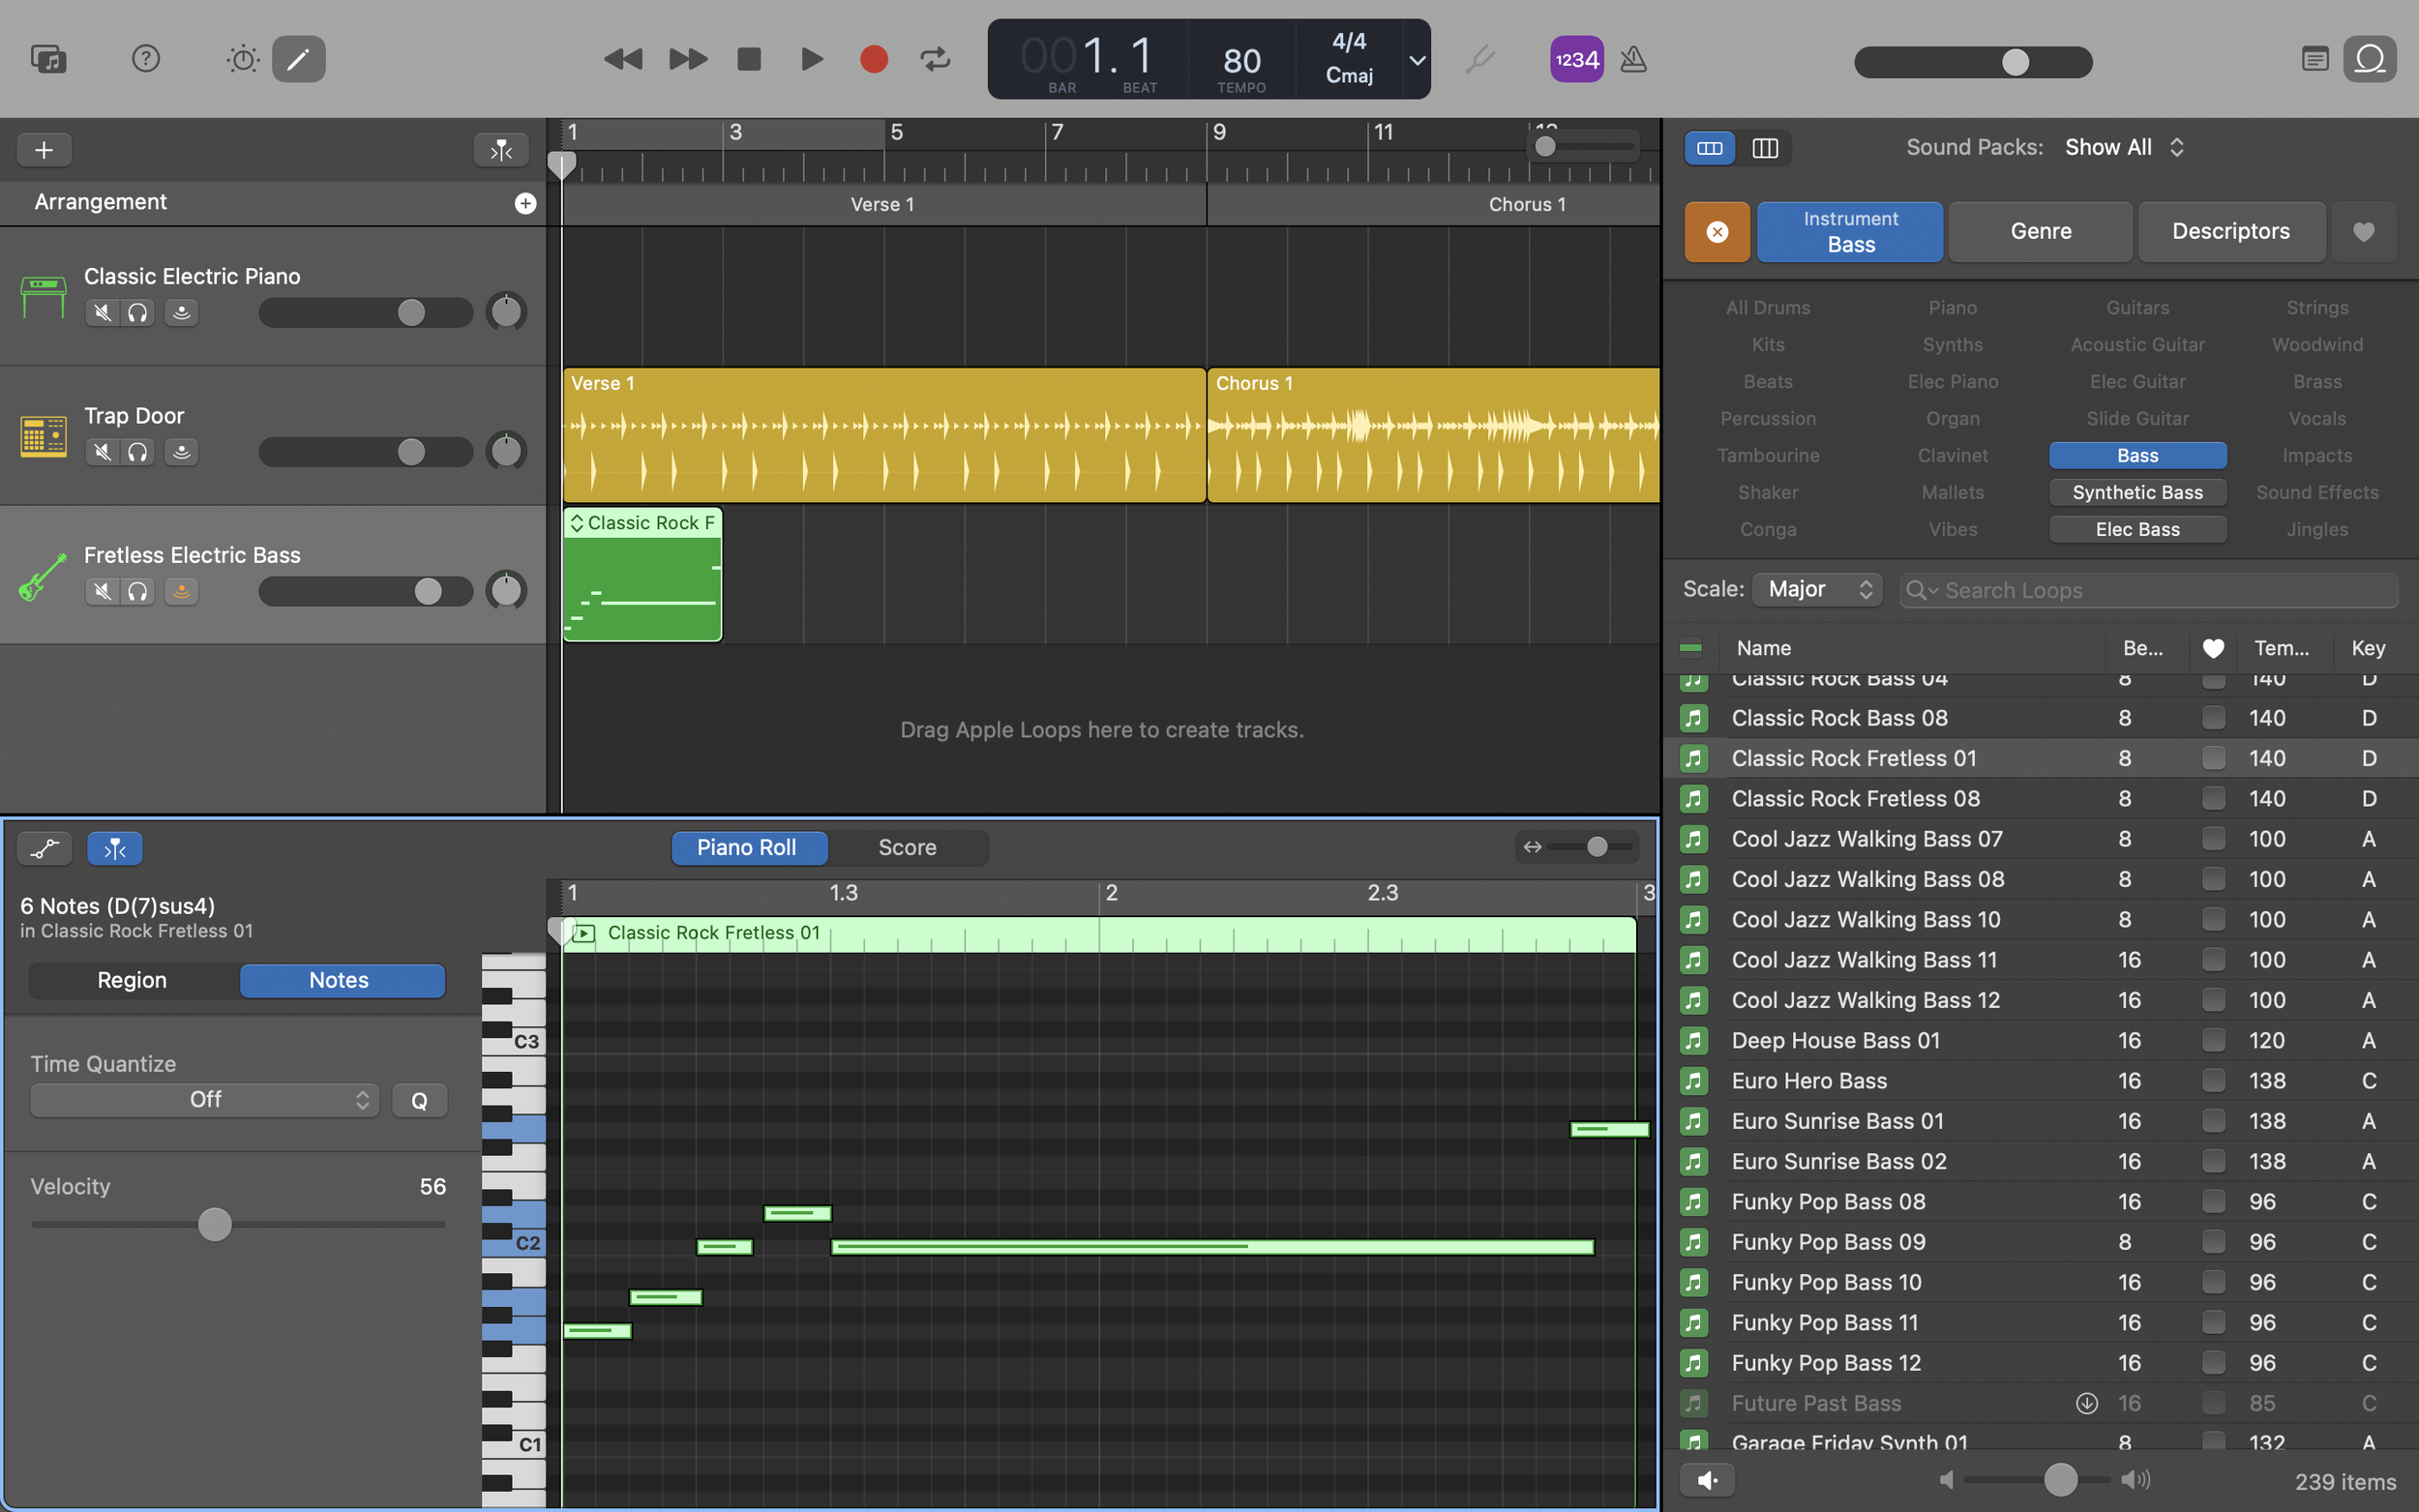
Press Option-Down Arrow or Option-Up Arrow the number of times the calculator gave—Option-Down Arrow is for negative numbers, and Option-Up Arrow is for positive numbers. In this image, Option-Down Arrow was pressed twice, based on the -2 number the calculator gave:
5. This step is for chorus loops only, not for verse loops. Put the loop in a different track:
In Chapter 4 of Contemporary Songwriting with Ableton Live and GarageBand, you are instructed to drag both verse and chorus loops into the project. For verse loops, the instructions above will work. For chorus loops, there are a few more steps, as follows:
First, drag the chorus loop into a new track, following steps 1-4 above.
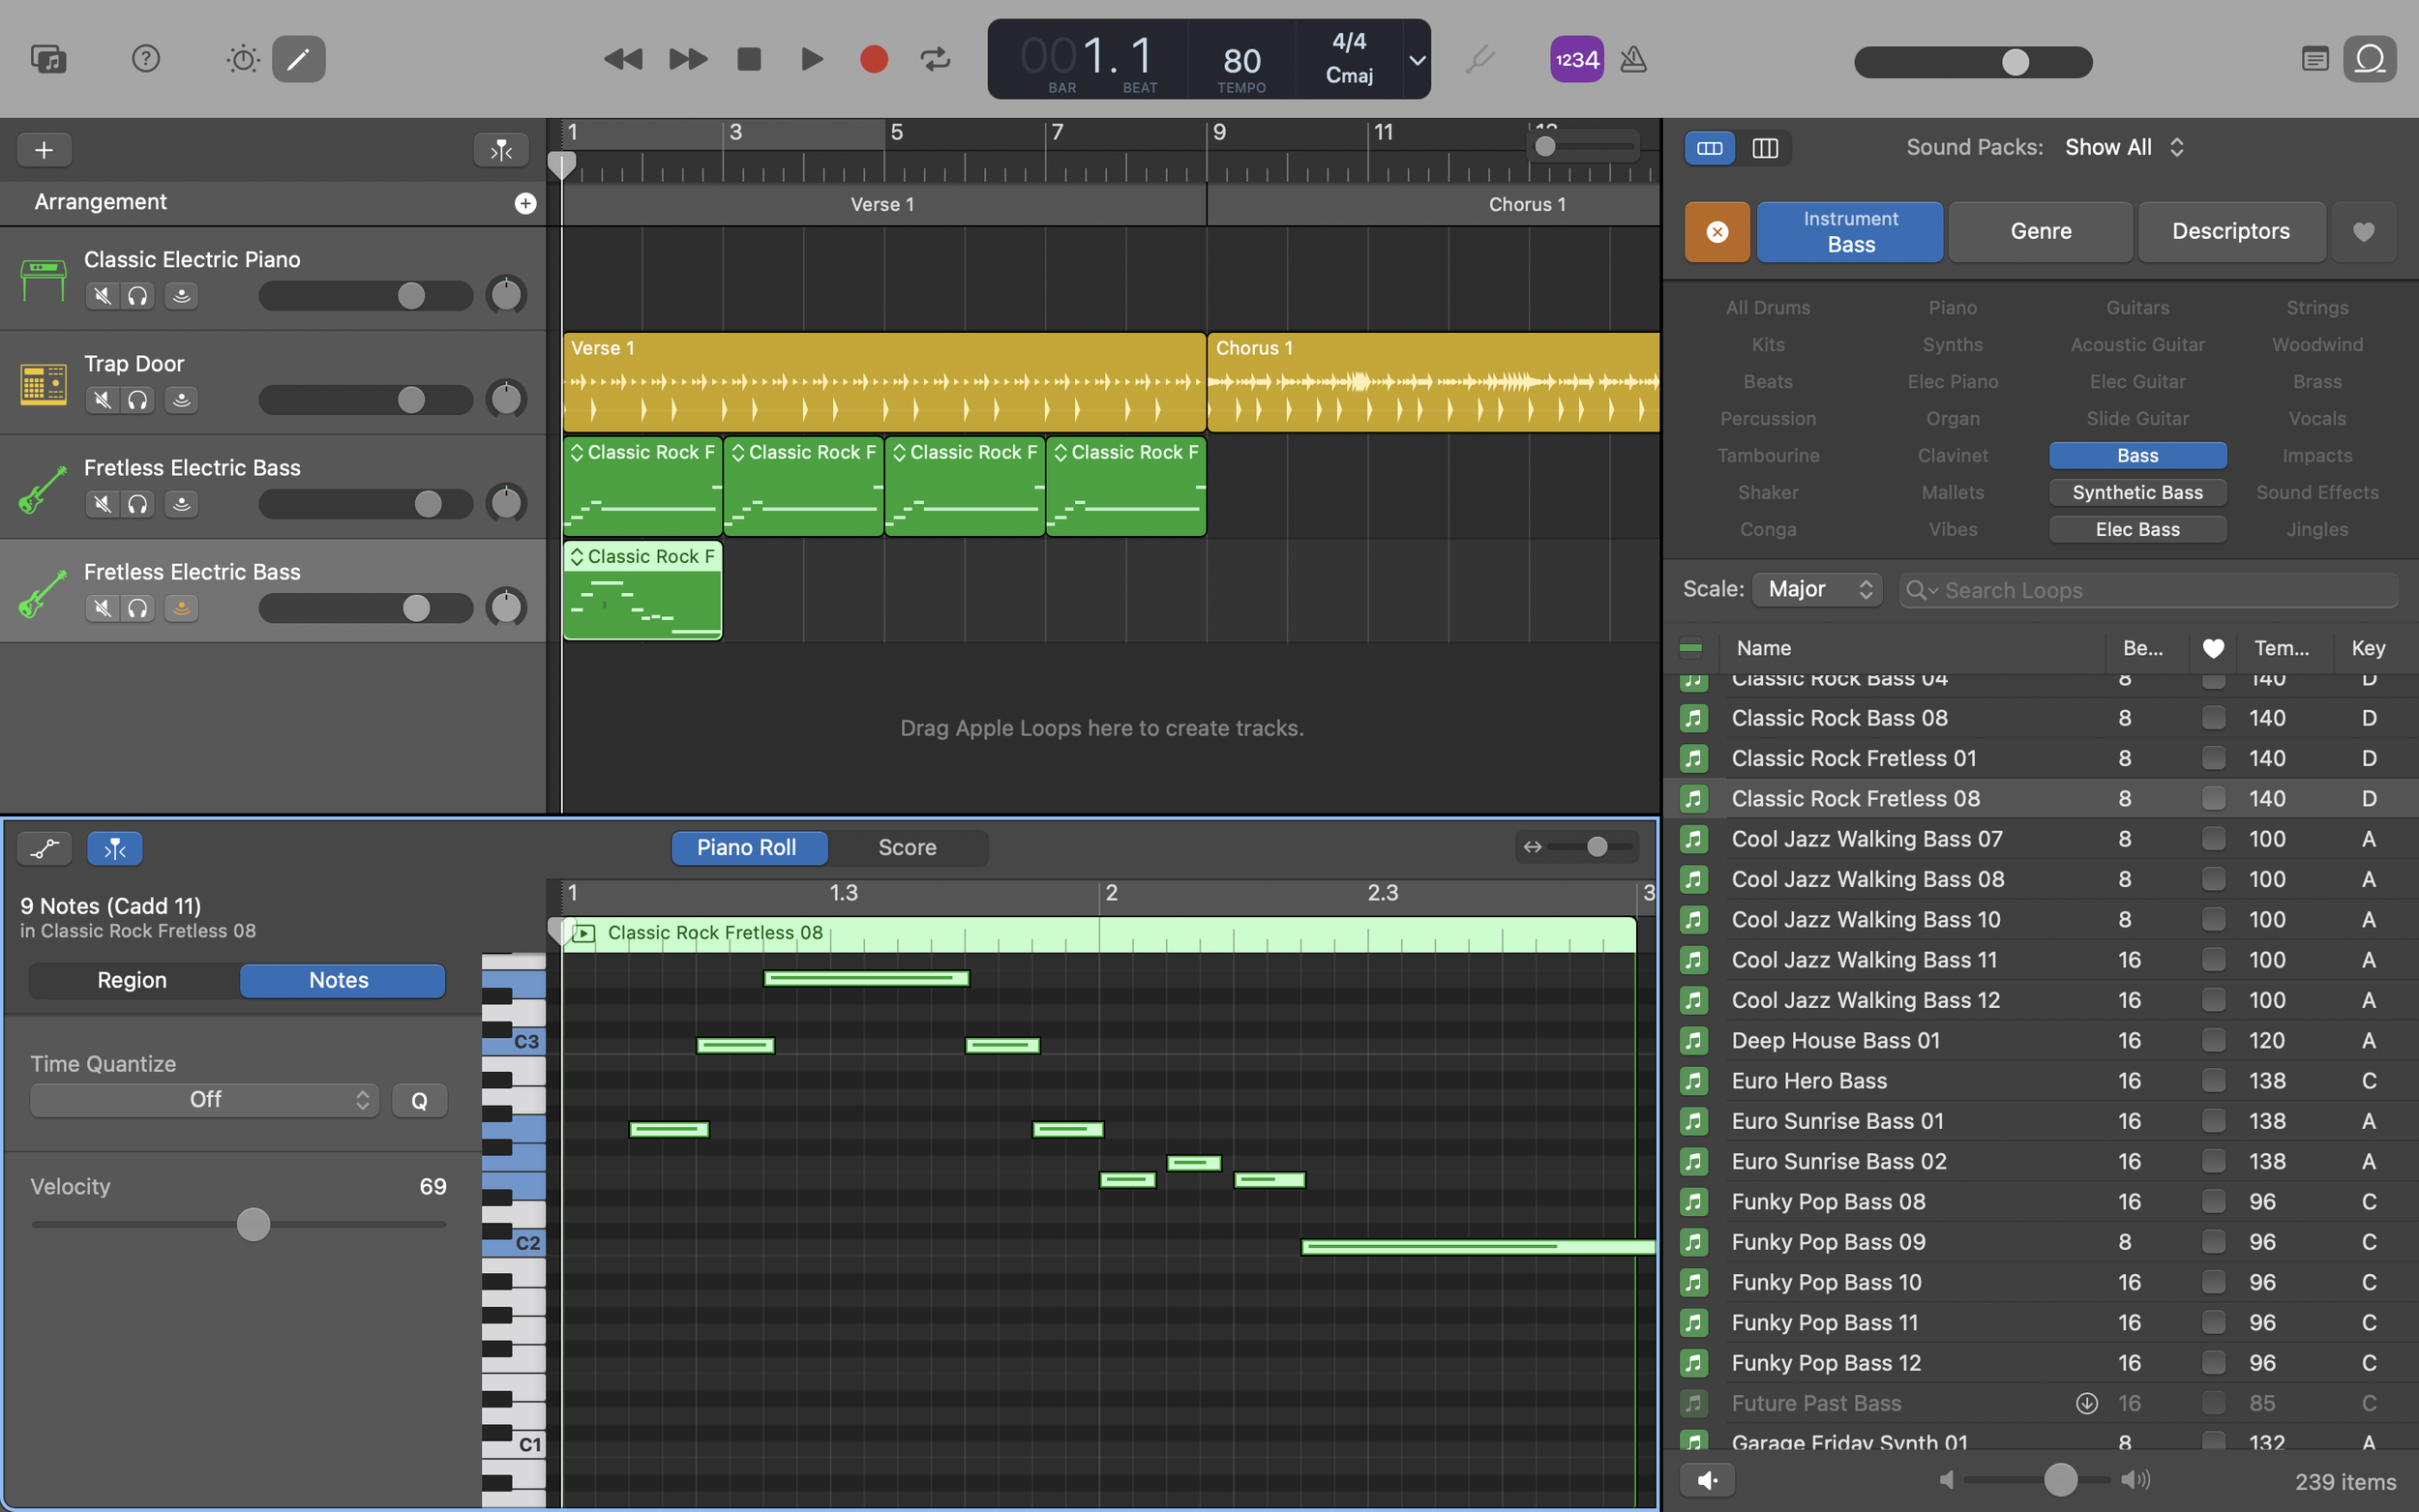
Then, drag the chorus loop into the chorus of the track it will go in, after the verse loops in that chorus.
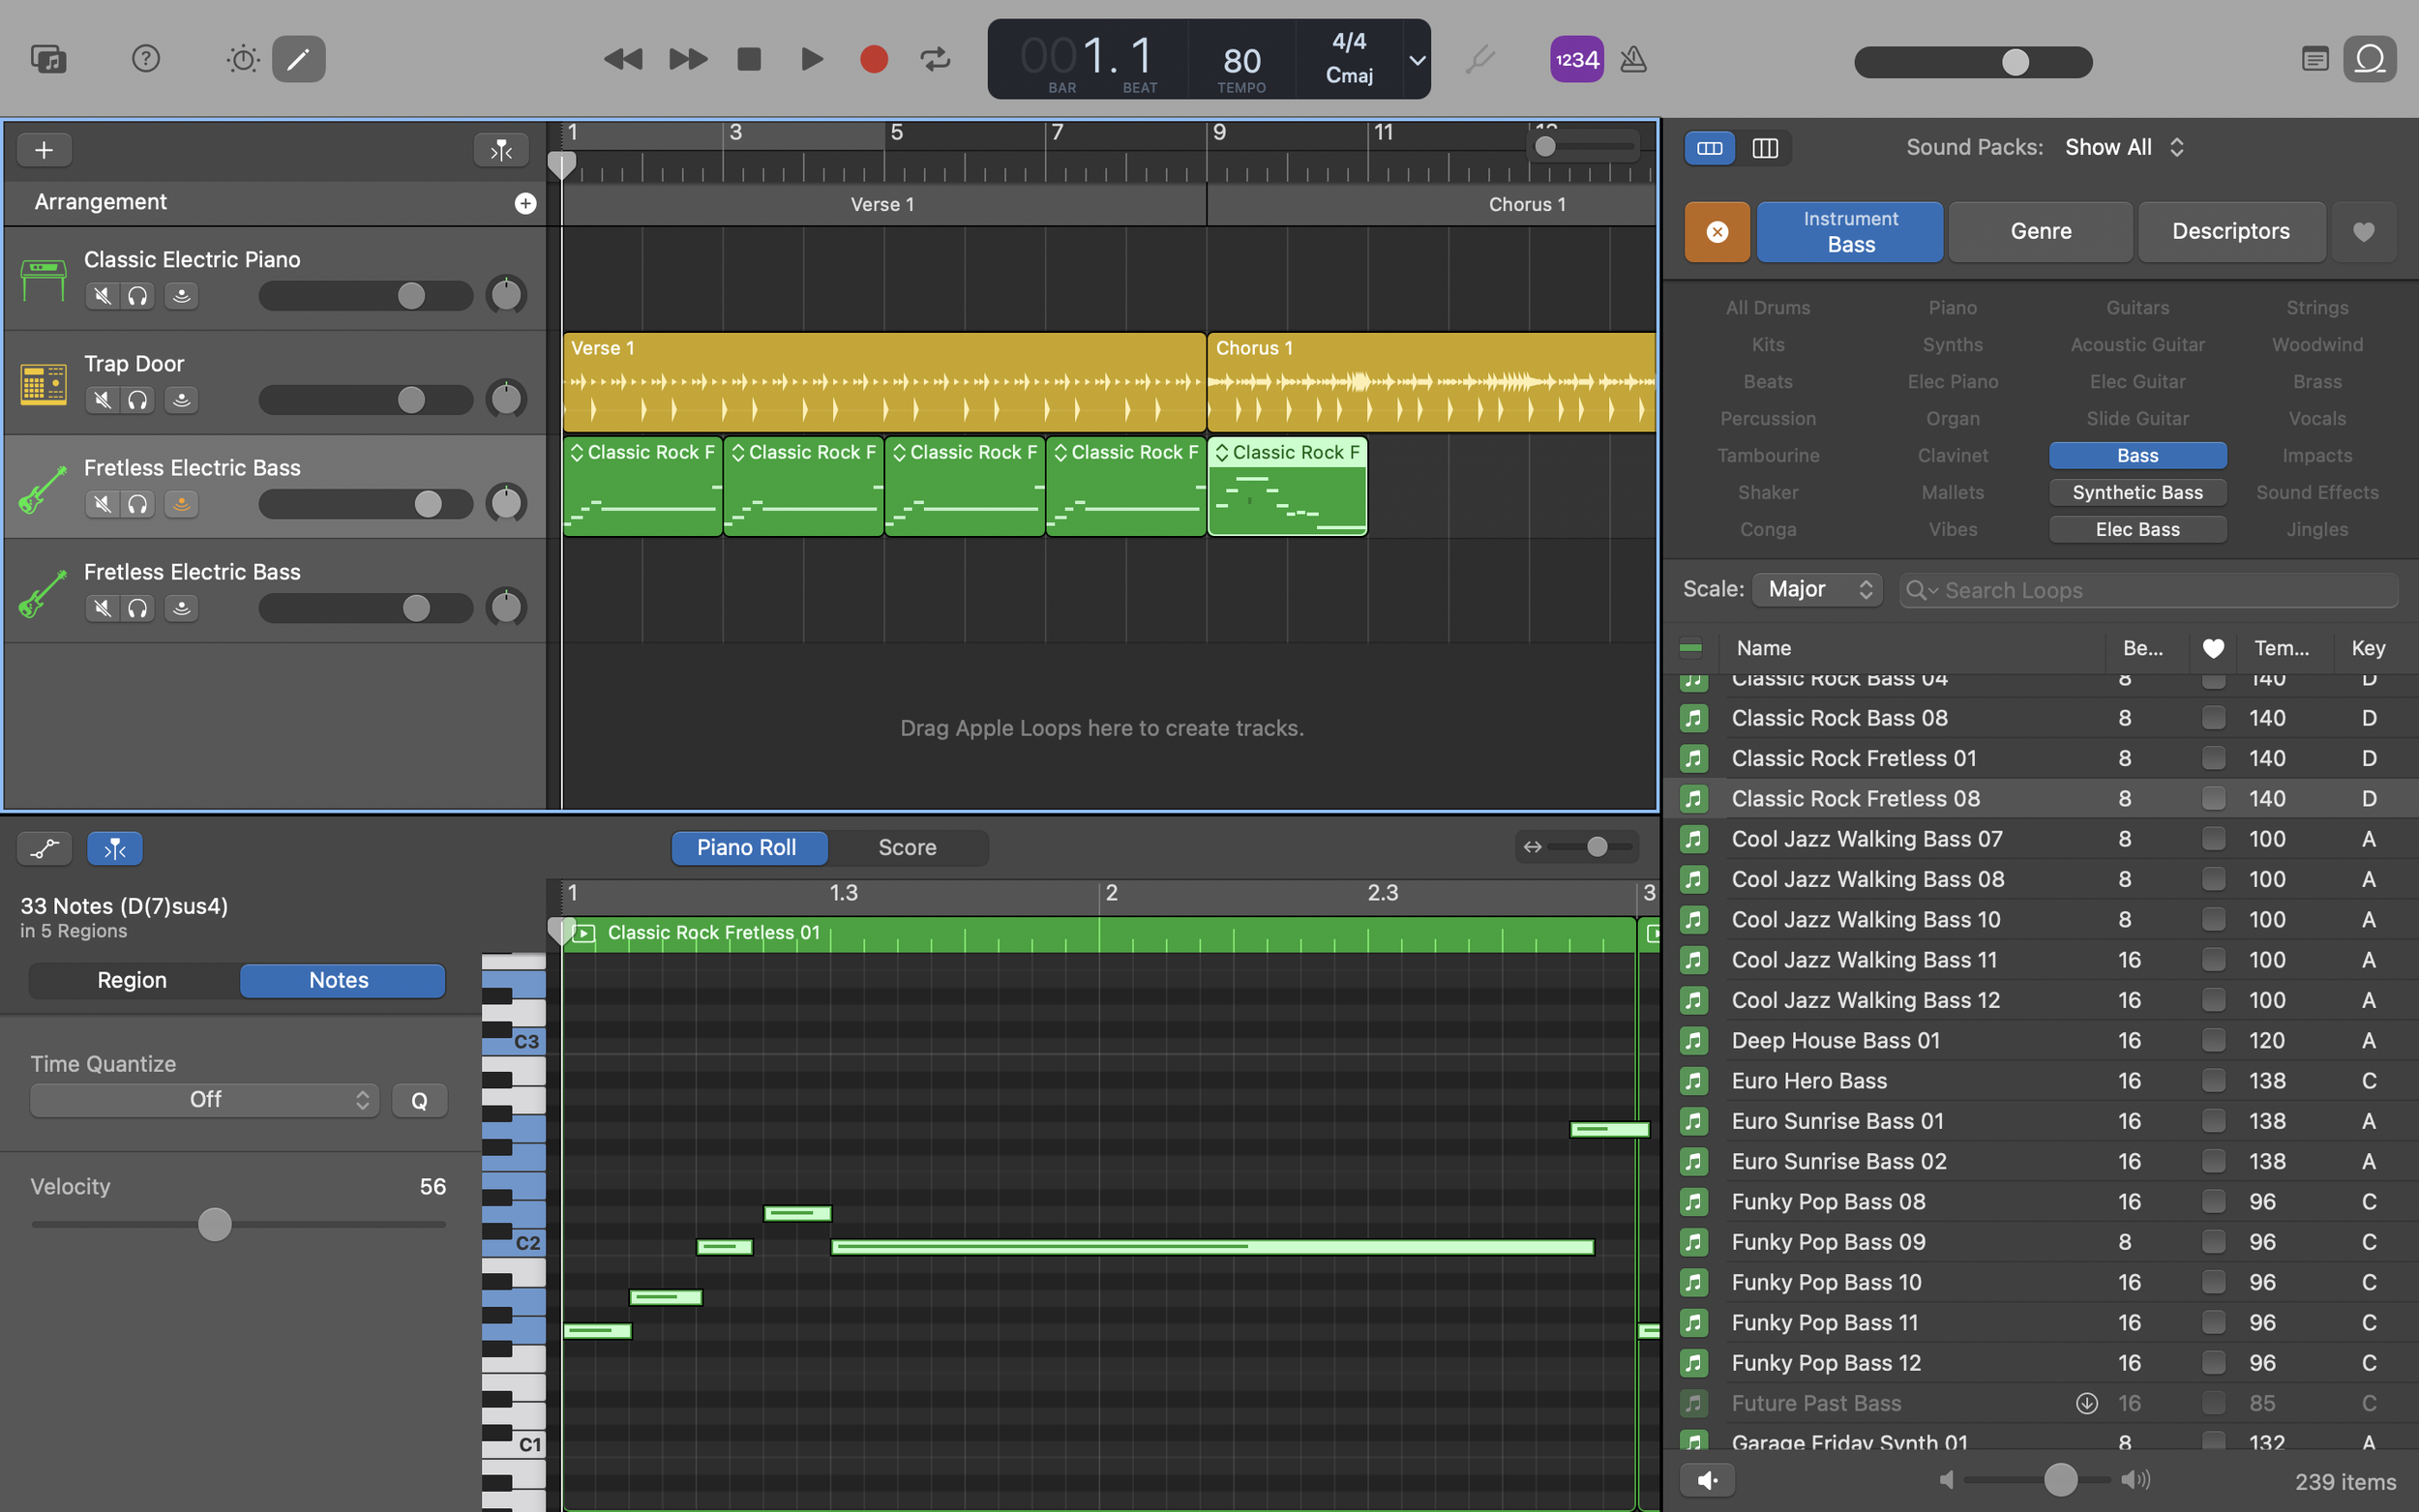
Finally, delete the now-empty track it used to be in.